Showing posts with label WWII. Show all posts

Sunday, May 31, 2026

Why the Germans Thought Normandy Would Fail

 As we approach June 6th, discussions inevitably turn to D-Day.

Why were the Allies successful? Why did the Germans fail?

Whenever these conversations come up among friends, fellow history buffs, and gaming buddies, I often find myself shaking my head because I think many people miss the most important point.

The Germans were not surprised that the Allies could win D-Day.

They expected it.

In fact, many German planners understood that if the Allies landed in force, they would probably win D-Day, D+1, and perhaps even D+2.

What they did not believe was possible was winning D+3.

Or D+14.

The German assumption was simple: once the Allies were ashore, German reserves would counterattack, contain the beachhead, and eventually push the invasion force back into the sea.

Why were they so confident?

Because they understood a fundamental reality of amphibious warfare.

You cannot sustain a modern army without logistics.

An army needs food, ammunition, fuel, medical supplies, replacement equipment, and reinforcements. Military planners often summarize these requirements as Beans, Bullets, and Black Oil.

The Germans knew they could not defend every mile of the Atlantic Wall. They lacked the manpower, equipment, and mobility necessary to stop every possible landing.

Instead, they focused on what they believed was essential for a successful Allied campaign:

A deep-water port.

Without a major port, the Germans believed the Allies would be unable to bring enough supplies ashore to sustain an offensive.

This wasn't an unreasonable conclusion.

German intelligence officers carefully studied Allied amphibious operations in North Africa, Sicily, Italy, and the Pacific. They looked at how American and British forces landed and how they sustained those operations.

They even identified what they believed was a flaw in American amphibious doctrine.

Most Allied landings had occurred near high tide. As the tide receded, landing craft often became trapped on obstacles, sandbars, and beaches. The Germans concluded that future invasions would require enormous numbers of landing craft, support vessels, and manpower simply to maintain the flow of supplies.

What never occurred to them was that the Allies would solve the problem in entirely new ways.

First, the Allies planned to land on a rising tide, accepting greater risk from beach obstacles in exchange for maintaining mobility.

Second—and far more importantly—they planned to bring the port with them.

The Mulberry Harbors remain one of the most remarkable engineering achievements of the war. Entire artificial harbors were assembled and towed across the English Channel, allowing supplies to be unloaded directly onto the beaches.

To German planners, the concept was almost unthinkable.

Ports were fixed structures. They existed in cities. Armies captured them.

The idea that an invading force could create a deep-water port where none existed simply did not fit within their understanding of how war worked.

Ironically, the Germans were not entirely wrong about the logistics problem.

On June 19th, less than two weeks after the landings, a severe storm swept through the invasion area. One of the Mulberry Harbors was heavily damaged and the American harbor off Omaha Beach was effectively destroyed. Had the Germans been correct about the Allies' inability to sustain themselves without a major port, the invasion might have stalled right there.

Instead, Allied logisticians demonstrated another innovation the Germans had underestimated.

Supplies continued to flow across the beaches.

By utilizing amphibious trucks, specialized landing craft, temporary piers, and an astonishing amount of organization, the Allies unloaded men and materiel at rates the Germans had believed impossible. The beaches themselves became the port.

In many ways, this was the real Allied victory at Normandy.

Not the landings on June 6th.

Not even the successful establishment of the beachhead.

The victory came from proving that a modern army could be supplied over open beaches long enough to build up overwhelming combat power.

The Germans had planned to defeat an enemy that required a port.

The Allies arrived having already solved that problem.

This is one of the reasons I believe the Germans misjudged Normandy.

It wasn't because they were stupid.

It wasn't because they lacked competent officers.

It wasn't even because they misunderstood Allied capabilities.

They made a reasonable assumption based on every historical example available to them.

What they failed to anticipate was that the Allies would fundamentally change the rules.

And when your entire defensive strategy depends upon assumptions about what your enemy cannot do, discovering that they can do it anyway is often the beginning of defeat.

Saturday, October 5, 2024

Mortain

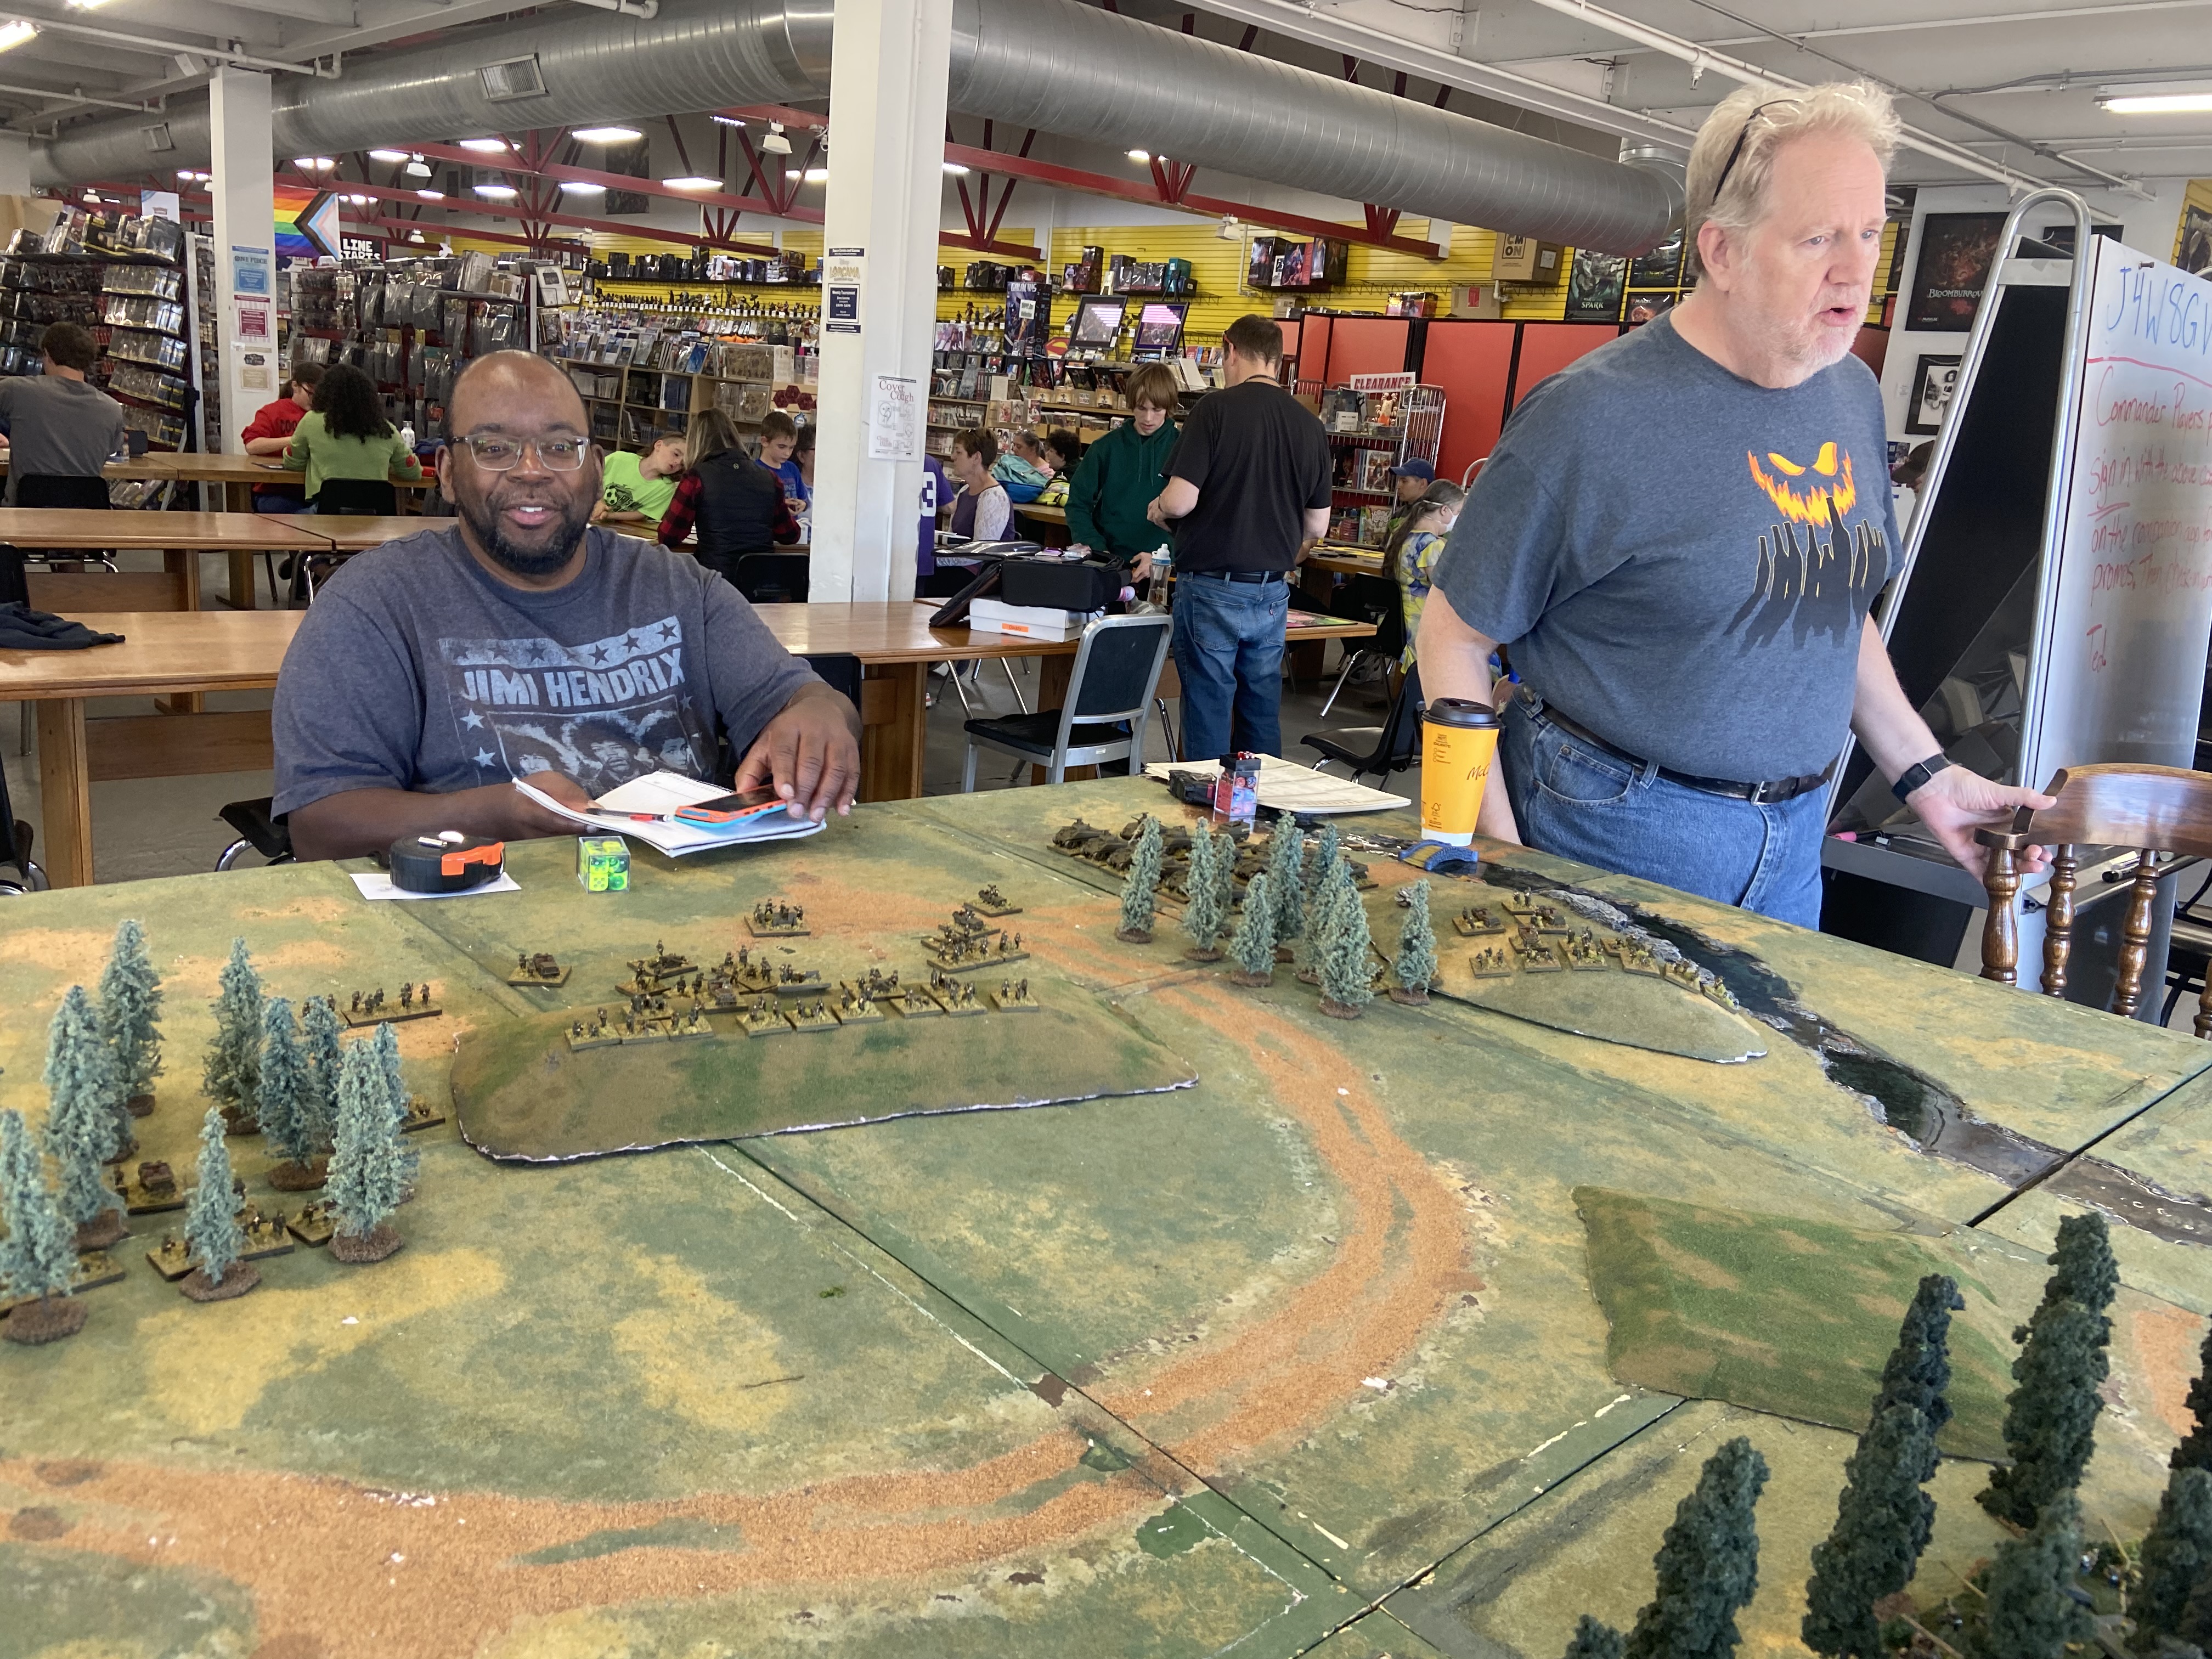
For the Centurions game I prepared a Spearhead Scenario loosely based upon the German Counter Offensive in Normandy, Operation Lüttich, August 7th, 1944.   

The scenario kicked off at 0600 on August 7th and looked at the first two to three hours with 8 turns.

We really haven't played Spearhead often in the past half-a-dozen years and it showed.    Okay the game might have been a fucktastrophy, if that was an actual word.

Why did the game bomb out and fail?

First the Scenario designer is an idiot.   Yes that is me.   I moved hill 314 from in front of Mortain to beside Mortain because I thought creating a more straight battle line would be more playable.  When I set up the table, the base plates, I setup a mirror image of what I needed to.   

Base Layout
Image of the base without trees and buildings when I tested out the layout a few weeks ago.  The Americans were going to be placed to the bottom of the table.  When I was testing the layout I was trying to figure out where to put hill 314.   
For logistical reasons I switched the Americans to the top of the table.   When I set up the table this morning, using my picture I forgot to flip the table 180 degrees.   I than decided to not spend ten minutes rotating the table to fix my mistake.   I simply moved Mortain and hill 314.   


Hill 314 on the Left Flank of Mortain
For the Germans I have the Herman Goering's Panzer Division from Sicily and the 5th Falschrimjager Division with a bunch of weird Regiments and battalions for Operation Market Garden.    These formations were going to be subbed in for the actual German forces of the oversized 2nd SS Panzer Division and 116 Panzer Division.   This substituting left the Germans short an Armored Battalion but close on Infantry.
For the record I have a large number of regular Germans either mostly painted or entirly painted on popsicle sticks that I had considered mounting up for this game.   I didn't because I ran out of time and because I am not 100% sold that we are going to continue to play Spearhead in 15mm.   I may organize them form Battlefront....  But that is another discussion.


American Airborne defending
For the Americans we used 4 Battalions of Airbourne, 2 battalions of Glider Infantry, four battalions of regular infantry and two battalions of Armor for 30th Infantry Division and CCB 2nd Armored.    
Much like the Germans I have 100 or so American regular Army painted up on popsicle sticks or mounted for Rate of Fire that are going to be remounted.   In theory these figures represent the 1st Infantry Division for Operation Husky, along with my Airborne, I just haven't had either time nor the "requirement" to get them done so they have waited.


Mortain and Hill 278
The Americans were about right for number of battalions and figures on the board.  I should have forced the Americans to divide up CCB 2nd Armored as they were done historically.

The Americans were assigned a defensive line cover Mount Furgon on the North Flank, Hill 314, Mortain, Hill 278, and Mortain Forest in the South.


Germans attacking
north of Mortain
The Germans were allowed to place their attacking Battalion commanders 18" from their baseline and their individual units 6" or 12" from their respective commanders depending on the size of the command.  In theory this put the Germans as little as 18" from the Americans.   The Germans put very few figures past the 18" line of the commanders on the battle line.   This added two to three turns for the Germans to move across no man's land where nothing happened.


The American's knowing we had a actually time limit for game play and turn limit int he scenario were willing to wait out the Germans.   If only the Germans take casualties and hold than it is an American Victory.   That is a problem with the scenario.

Northern Flank of the Americans
The German players misunderstood their objective.   Before the game I explained the Germans had reinforcements that would support the attack once the battle was engaged.   See the comment about the German's not being as far forward as they could have been and a German Commander slow playing as he counted noses in front of him.     I prepared a path and objective for the German reinforcements before the game started, I did not explicit tell the German players that when the forces on the right were engaged the reinforcements would follow up.  


The Germans on the left flank attacked head long into the teeth of the American "airborne".  Full speed ahead.  
Germans attacking on
the Southern Flank

The question in center is would the Germans have enough men to attack Mortain.  

Neither side effectively used their available off-board artillery.   That's an understatement.   Both sides had plenty of Artillery and even though I used a sheet to space out its availability, neither side called artillery, until the American side decide "what the heck why not."   It is so frustrating to watch both side squander opportunities.

In the end we played five of the eight turns, the Germans pushed the Americans on the Center Left, fought to a standstill on the left but did nothing on the right, even if played out all 8 turns the result wouldn't have changed.     

I would like to play this scenario again, knowing what I know now, putting hill 314 forward into the gap, making the Germans attack and maybe allowing one of the German Armor battalions a flank march,  the Germans may not win but it would be a much more interesting scenario.


Thursday, July 22, 2021

Barbarossa - The Introductionary Battle- AAR

 
A Rough Map of our game on Saturday, July 17th at the Source.    

  • SVT 1 - Soviet Assault Platoon
  • SVT 2 - Soviet Rifle Platoon
  • SVT 3 - Soviet Rifle Platoon and HMG
  • SVT 4 - Soviet Assault Platoon
  • Ger 1 - German Infantry Platoon and HMG
  • Ger 2 - German Infantry Platoon and ATG
  • Ger 3 - German Engineers and Panzer II
  • Ger 4 - German Infantry Platoon

The German Plan was to move the 1st two German Infantry Platoons to the left gap and reinforce with the Engineers while the 3rd German Infantry Platoon was aimed at small village controlled by SVT3


Brad and Jack
After running the play test two weeks prior I decided to scale back the scenario.   There were practical reasons for this; including I hadn't a single German painted.   There was also a play issue about having too many figures in each players control  while learning the game.    To be honest I was not expecting it to go well at all and on Wednesday prior I was extremely concerned.

With eight new players, each controlling about 40 figures I think the game played far better than I had expected.  


Rolf, Odin, Jim, Steve, and Marty
German TO&E
Ger 1
  • Command (Lieutenant, Messenger, Messenger, Sniper)
  • Squad 1 (Squad Leader, Assistant Squad Leader, Rifle|Rifle, Rifle|Rifle, Rifle|Rifle, LMG)
  • Squad 2 (Squad Leader, Assistant Squad Leader, Rifle|Rifle, Rifle|Rifle, Rifle|Rifle, LMG)
  • Squad 3 (Squad Leader, Assistant Squad Leader, Rifle|Rifle, Rifle|Rifle, Rifle|Rifle, LMG)
  • HMG (HMG, HMG)
  • Forward Observer
First Fire.  The Soviets LMG takes on some
German Infantry on the Soviet Left.
Ger 2 

  • Command (Lieutenant, Messenger, Messenger, Sniper)
  • Squad 1 (Squad Leader, Assistant Squad Leader, Rifle|Rifle, Rifle|Rifle, Rifle|Rifle, LMG)
  • Squad 2 (Squad Leader, Assistant Squad Leader, Rifle|Rifle, Rifle|Rifle, Rifle|Rifle, LMG)
  • Squad 3 (Squad Leader, Assistant Squad Leader, Rifle|Rifle, Rifle|Rifle, Rifle|Rifle, LMG)
  • 50mm Mortar
  • ATG (ATG, ATG)


Ger 3
  • Engineers (Squad Leader, Assistant Squad Leader, SMG|Rifle, SMG|Rifle, Rifle|Rifle, Flame Thrower|Rifle, LMG)
  • Engineers (Squad Leader, Assistant Squad Leader, SMG|Rifle, SMG|Rifle, Rifle|Rifle, Flame Thrower|Rifle, LMG)
  • Trucks (Truck, Turck)
  • Panzer II (Panzer II, Panzer II, Panzer II)
Ger 4
  • Command (Lieutenant, Messenger, Messenger, Sniper)
  • Squad 1 (Squad Leader, Assistant Squad Leader, Rifle|Rifle, Rifle|Rifle, Rifle|Rifle, LMG)
  • Squad 2 (Squad Leader, Assistant Squad Leader, Rifle|Rifle, Rifle|Rifle, Rifle|Rifle, LMG)
  • Squad 3 (Squad Leader, Assistant Squad Leader, Rifle|Rifle, Rifle|Rifle, Rifle|Rifle, LMG)
  • 50mm Mortar

SVT 1
  • Command (Lieutenant, Messenger, Messenger, Sniper)
  • Squad 1 (Squad Leader, Assistant Squad Leader, SMG|SMG, SMG|SMG, SMG|SMG, LMG)
  • Squad 2 (Squad Leader, Assistant Squad Leader, SMG|SMG, SMG|SMG, SMG|SMG, LMG)
  • Squad 3 (Squad Leader, Assistant Squad Leader, SMG|SMG, SMG|SMG, LMG, LMG)
  • HMG (HMG)

SVT 2
  • Command (Lieutenant, Messenger, Messenger, Sniper)
  • Squad 1 (Squad Leader, Assistant Squad Leader, Rifle|Rifle, Rifle|Rifle, Rifle|Rifle, LMG)
  • Squad 2 (Squad Leader, Assistant Squad Leader, Rifle|Rifle, Rifle|Rifle, Rifle|Rifle, LMG)
  • Squad 3 (Squad Leader, Assistant Squad Leader, Rifle|Rifle, Rifle|Rifle, LMG, LMG)


SVT 3
  • Squad 1 (Squad Leader, Assistant Squad Leader, Rifle|Rifle, Rifle|Rifle, Rifle|Rifle, LMG)
  • Squad 2 (Squad Leader, Assistant Squad Leader, Rifle|Rifle, Rifle|Rifle, Rifle|Rifle, LMG)
  • Squad 3 (Squad Leader, Assistant Squad Leader, SMG|SMG, SMG|SMG, LMG, LMG)
  • HMG (HMG)

SVT 4
  • Command (Lieutenant, Messenger, Messenger, Sniper)
  • Squad 1 (Squad Leader, Assistant Squad Leader, SMG|SMG, SMG|SMG, SMG|SMG, LMG)
  • Squad 2 (Squad Leader, Assistant Squad Leader, SMG|SMG, SMG|SMG, SMG|SMG, LMG)
  • Squad 3 (Squad Leader, Assistant Squad Leader, SMG|SMG, SMG|SMG, LMG, LMG)


For those paying attention, my first screw up.   I grabbed two Soviet Assault Platoons and 1 Rifle Platoon rather than the other way around 1 Assault Platoon and 2 Rifle Platoons.  Its not too out of the ordinary for the Soviets at the time, many of the new battalions and divisions were given PPD-40 SMG or the new PPSH-41 SMG depending on your source.  However for Game Balance...

My Second Screw up, my printer ran out of toner and I didn't print up the Command Cards.  SO players were reading the back of the figures and my notes to determine what they had. 

My third mistake, not enough pictures. 


 Actual movement map.


A few comments

  • Ger 1 got bogged down in the terrain.
  • Ger 2 got to the wood line and found Soviets, after a brutal exchange the Germans pushed the Soviets out of the Woods
  • Ger 3 got bogged down getting around the stream, including getting a truck stuck in the Russian Mud.
  • Ger 4 marched out, got 1 squad destroyed, pushed a few Soviets out of the woods and created there little fort in the clump of trees and started digging in.
  • SVT 1 - Marched into the woods, and rolled badly on some morale rolls (all three squads failed right before the Germans engaged in melee) and were pushed out.  
  • SVT 2 - Thinks they saw something during the game, but the magic eight ball says probably not.
  • SVT 3 - Attempted to shoot Ger 4 out of the woods for no effect.
  • SVT 4 - Hey these PPD-40 don't have any range, I better move.  


Things that we got wrong in the Rules
  • Being in Light woods is not both Light Cover and a Hinderance while shooting.  It is a hinderance for spotting.  Go figure.
  • Heavy Support Weapons cannot move "At the Double" nor "Cautiously".
Things I am not happy with
  • Observation Rules.  
  • Players moving their figures as a clumped mob.
  • Observation Rules
  • Jim is not happy with the AVF Combat Rules
  • Observation Rules
  • The Quick Reference Sheets are incomplete
  • Observation Rules
The Quick Reference Sheets are incomplete.   There are at least four tables that should be on there that are not.   It is frustrating for players to not know what they are looking for.

Clumped Mob of figures.   It just drive me nuts, I realize it is from playing all those Horse and Musket games, but man what Artillery would do.

Jim doesn't like the combat rules for Armored Fighting Vehicles, calls it cumbersome.   I got to be honest this is not a Tank game, so I am not sure it matters that you have to roll, to hit, determine where you hit, determine penetration, and determine effect.   There is really not much way of simplifying without making it super boring.   

Observation Rules.   To be covered in a separate post.

Friday, July 16, 2021

Rate of Fire - Sample Command Cards

I have created these information or command cards for our upcoming game of Rate of Fire for the Centurions game day at the Source.

Each card represents a unit which is typically a squad. for the game.   Providing the basic organization of the squad and their morale grade, plus additional notes.   The example is a platoon of German Infantry.  The Command element, four squads and the attached 50mm Light Mortar.

Monday, July 5, 2021

Painting Guide - Early War German Infantry


Figure
  • Prime Black
  • Mahogany Brown - Exposed Flesh
  • German Dark Green - Helmet, Tunic
  • Green Grey or London Grey - Pants
  • German Feldgrey - Tunic
  • Khaki - Bread Bag
  • Uniform Green - Gas Mask Container
  • Beige Brown - Leather Packs
  • Flat Brown - Wood Rifle
  • Dark Flesh - Highlight Exposed Flesh
  • Black - Belting Touch Up
  • Bolt Metal or Gun Metal - exposed Metallic Bits
  • Castellan Green - Base
Base
  • Prime Dark Forest Green
  • Glue - Medium Brown Ballast
  • Super Glue - Rocky Bits
  • Tuft Tac - 4mm Green Grass

Wednesday, May 12, 2021

Kursk to Barbarossa? Creating a Project

Osprey Publishing "Operation Barbarossa 1941 (1)  Army Group South"At 3:15 AM on Sunday morning June 22, 1941 the Axis forces lead by the German Army began the invasion of the Soviet Union.   The enormity of this invasion can be measured in one stat, eighty percent of the all the Axis Military forces were committed to battle in one fell swoop.  

The numbers are staggering.  The Axis forces committed 166 Divisions, 3.8 Million men, 3,400 armored fighting vehicles, and 2,700 aircraft.  The Soviet Union countered with 220 Divisions, 2.8 million men, 11,000 armored fighting vehicles, and 7,100 aircraft.    

Over the five months of combat during Operation Barbarossa (June 22 - December 5) the Axis forces suffered over 1 million casualties, including 186,000 Killed in Action, 660,000 wounded, 40,000 Missing in Action.   2,735 Armored fighting vehicles destroyed, 2,870 aircraft lost.  

The numbers for the Soviet Union were even higher.   567,000 Killed in Action, 1.3 million wounded or injured, 2.8 million Missing in Action, 21,000 Armored Fighting Vehicles destroyed, and 11,000 aircraft lost.     

This summer marks the 80th anniversary of Operation Barbarossa. I was reminded of this late last week.  After some discussion and some personal reflection it was decided to pivot our project to Operation Barbarossa.  

This change is not without issues.   Currently I have 0 German armored fighting vehicles for this era of WWII.  No Panzer II and Panzer III's that I own are from later in the war.   On the Soviet side I do own 3 T-26 Light Tanks 6 KV-1 Heavy Tanks.   

That changed with an order to Old Glory Miniatures over the weekend.   

On the Soviet side I have 3 platoons of painted infantry (2 SMG, 1 Rifle) plus 2 companies worth of assets (Anti-Tank, Anti-Tank Rifle, Mortar and Heavy Machine Gun) ready.   I have 3 platoons of infantry on the painting table (1 SMG and 2 Rifle), 1 company of T-26 Light Tanks and 1 company of KV-1 Heavy tanks.  

On the Axis Side I have 1 squadron of German Cavalry, 2 platoons of German Infantry and 1 company worth of German Tanks, once my order from Old Glory is received.

Thursday, April 15, 2021

Kursk! Creating a Project

 Why it is Interesting to Wargamers

The pure scale of the battle.  

The Battle of Kursk is one of the largest single battles of WWII involving 2,000,000 troops, 6,000 armored fighting vehicles, and 4,000 aircraft.  It is difficult to place that in scale of how large a battle that was especially for those of us who grew up in the west.    The fighting on D-Day involved 200,000 men and the height of operations in the North West Europe Theater of Operations was a combined total of 2,750,000 men prior to the push into Germany in 1945.

The gamers belief that the German's were close to victory.   

Often when gamers look at large battles they key into small decision declaring "I would never do that, it cost them victory."  The Battle of Kursk, or rather the individual engagements offer plenty of those small decisions.  Some large ones as well.  
As an individual with a History Degree and reading five to many books on the topic, the Germans were never in a position to win the battle.  Even if they did it wouldn't really change anything.   They were grossly out numbered on multiple fronts and the American war machine was now in high gear.        
As an scenario designer it appears feasible to build multiple scenarios on both the northern and southern fronts that have opportunity for both sides to succeed and win.   

Tanks, Tanks and more Thanks.  

With over 6,000 armored fighting vehicles engaged, Kursk is the largest tank battle in history.   A gamers delight as it were.   
On the Western Front to adequately have a historic game you should have roughly 9 to 10 stands of infantry for every single stand of Armor.   Gamers "love" tanks and only begrudgingly play infantry, as a general rule of thumb.   So you usually see too much armor represented on the western front, from the Western Desert to Northwest Europe.   At Kursk depending on the exact engagement it is more of a one to one ratio at the platoon level.   .    

Tuesday, April 13, 2021

Kursk! - Creating a project


Background

Operation Barbarossa began on 22 June 1941 as the German Military and its allies began the invasion of the Soviet Union, creating the Eastern Front.  The onslaught of the German Military might continued for nearly 6 months as they pushed the armed forces of the Soviet Union back over 600 miles.   In December 1941 the German Offensive stalled and the Soviet Counter offensives began creating a war of attrition the Germans and their allies could not win.

In the spring of 1942 the Germans had stabilized the Eastern Front and began a new series of offensive attacks to defeat the Soviet armed forces.   The Soviets prepared for the summer offenses of the Germans by planning to defend Moscow at all costs.   The German offenses of summer of 1942 practically ignored Moscow as they targeted other strategic locations.   One of these German offenses targeted the Soviet city of Stalingrad in the Southwest of Russia.   Stalingrad was an essential transportation hub on the Volga river, connecting the greater Soviet Union to resources of the southern Russia, namely oil.   The Germans also saw propaganda in taking a city named after the leader of the Soviet Union, Josef Stalin.      

The battle of Stalingrad began in August 1942 and quickly turned into a grinding back and forth inch by inch battle.   As the calendar neared the end of 1942 the Soviet Army launched two offenses of their own near Stalingrad, Operation Uranus and Operation Little Saturn.    The conclusion of Operation Little Saturn saw the German Sixth Army surrounded and in February 1943 the German Sixth Army Surrendered.  

The loss of the German Sixth Army nullified much of the gains of the German Army and their allies had achieved in Caucus region of the Soviet Union during the summer of 1942.   In early spring 1943 the German Army planned a summer offensive which would isolate and destroy several individual Soviet Armies.  The plan was to allow the Soviets to reinforce a salient or outward bulge in the front lines of the Eastern Front near the Soviet City of Kursk.   

The Germans Wehrmacht (Army) were desperately under strength at this point, the average unit was between 33% and 50% undermanned.   This factor pushed the lead from the Wehrmacht's infantry divisions to the German Mechanized Panzer Divisions.     

In 1941 and 1942 the Military Intelligence of the Soviet Armed forces were virtually blind to the German Plans.   They made guesses based upon what the knew and were wrong more often then they were right.   In 1943 it was different story.   The British Intelligence agency was sharing decoded high level communications between the German Command in the field and headquarters in Berlin, they had cracked the enigma code.   The Soviet military planners planned a war of attrition using a defense in depth strategy.   With a defense in depth strategy the Soviet military planners also allowed for floating reserves giving local commanders the ability to commit these forces.   

The German offensive started on July 5 and lasts 11 days.   The Soviet counter offense begins on July 12 and lasts until August 23rd.   

The battle of Kursk, or battles if you'd prefer, took place halfway between the invasion of Soviet Union with Operation Barbarossa and the surrender of the German Armies to the Allies.   The result of the battle was a tactical stalemate for both sides, but a strategic victory of the Soviet Union.   The Germans for the first time did not break through the Soviet defenses.   The Soviet losses were horrific.   The cost of men and machine are still debated in academic circles today.         

Friday, May 15, 2009

Campaign this Fall - Plan Made

After much discussion with people and looking at sources I think the most interesting situation to campaign will be “The Periphery Campaign” of early World War II, AKA “Wavell’s War”. “Wavell’s War” constitutes the actions in North Africa, East Africa (British Somaliland), The Balkan’s, and The Middle East (Iran, Iraq, Syria, Lebanon) that were fought while Archibald Wavell was the Commander and Chief British Forces in the Middle East (1939-1942).

The campaign will not be a campaign in the strictest sense but rather a series of games representing the campaigns and operations that mark Wavell’s War. Some of the games may be interconnected (The Italian invasion of British Somaliland followed by the later British Counter Attack) where the results of one battle may have an effect on the victory conditions and organization of the following battle.

The games will be played using “Spearhead” with 15mm Figures.
I understand the scale of Spearhead is not necessarily in line with the scale of the games that may be played and that some orders of battle may be adjust to allow for playability; however my end goal is to run a relatively large battle sometime late winter or early spring 2010. This big battle would be on the order of 4 divisions aside fought on 40 linear feet of tabletop, I hope that is more than a pipe dream.

For this I am currently committing to providing:
Italian Colonial Command ~12 Battalions of Colonial Troops, 3 Battalions Black Shirts, 1 Armor Battalion
German Ramcke Parachute Brigade - 4 Battalions of German Fallschirmjagers (Basically already completed)

Fitz tells me he is interested and has approximately one British Brigade for the Desert and would be willing to expand.

If enough interest is generated I probably will paint more figures but for now this is what I have committed to.

If figures are available we may do some of the action outside of what is normally considered Wavell’s command, West Africa, South East Asia, South Asia, and the Pacific Rim.
For this I have approximately two divisions of Imperial Japanese Army and some IJN ground forces.

Let me know if you are interested. I'll be honest I am looking for people to paint Infantry for both sides. Historically there were 10 infantry battalions to 1 armor battalions in the theatre so you will see a realitivily few armor (and similiar) commands on the table top for these games.